In a world where our smartphones are an extension of ourselves, a cracked screen can quickly become a major inconvenience. Fear not, for we have crafted a step-by-step guide to help you replace your smartphone screen like a pro. Say goodbye to shattered displays and hello to a brand new, crystal-clear experience. Let’s dive in and take the first step to giving your beloved device a fresh new look.

Gathering Necessary Tools and Supplies
Before you begin the process of replacing your smartphone screen, it is important to gather all the necessary tools and supplies. This will ensure a smooth and efficient repair process. Here is a list of items you will need:
- Replacement Screen: Make sure to purchase a screen that is compatible with your specific smartphone model.
- Small Screwdriver Set: To remove the screws holding the phone together.
- Plastic Opening Tools: To safely pry open the phone without causing damage.
- Adhesive Strips or Glue: To securely attach the new screen to the phone.
Additionally, it is helpful to have a clean, well-lit workspace to perform the repair. A magnifying glass may also be useful for seeing small components more clearly. Once you have gathered all the necessary tools and supplies, you will be ready to begin the screen replacement process. Remember to work slowly and carefully to avoid damaging any components of your phone.
Preparing Your Smartphone for Screen Replacement
Ready to take on the challenge of replacing your smartphone screen? Follow these steps to prepare your device for the screen replacement process:
- Backup Your Data: Before starting the screen replacement, make sure to backup all of your important data such as contacts, photos, and documents to avoid any loss during the process.
- Gather Necessary Tools:Ensure you have all the required tools for the screen replacement, such as a screwdriver set, a suction cup, and a plastic opening tool.
- Power Off Your Smartphone: To prevent any damage to the device, make sure to power off your smartphone before beginning the screen replacement.
- Remove External Accessories: Take off any external accessories attached to your smartphone, such as phone cases or screen protectors, to make the screen replacement process easier.
By following these simple steps, you can properly prepare your smartphone for a successful screen replacement. Stay tuned for the next steps in our step-by-step guide!
Removing the Damaged Screen and Discarding Properly
To remove the damaged screen, you’ll first need to gather the necessary tools: a small Phillips head screwdriver, a plastic opening tool, and a replacement screen. Begin by powering off your smartphone and removing any remaining screws on the back panel. Once the screws are removed, gently pry off the back panel using the plastic opening tool. Take care not to damage any of the components inside.
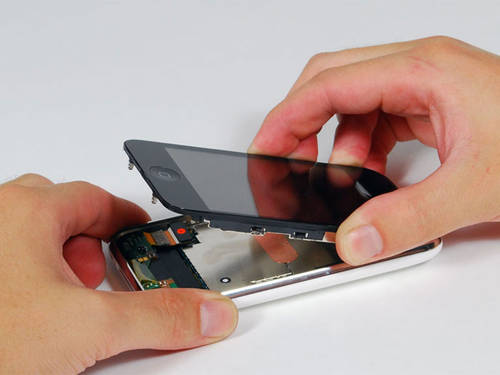
Next, locate the screws holding the damaged screen in place and carefully remove them using the Phillips head screwdriver. Once the screws are out, gently lift the damaged screen away from the frame, being mindful of any attached cables. Disconnect any cables connecting the screen to the phone, and set the damaged screen aside for proper disposal. Remember to recycle or dispose of the damaged screen responsibly to reduce environmental impact.
Installing the New Screen and Testing Functionality
After carefully removing the old damaged screen from your smartphone, it’s time to install the shiny new replacement screen. Begin by aligning the new screen with the edges of the device, making sure it fits perfectly. Use gentle pressure to secure the screen in place, ensuring it is firmly attached.
Next, power on your smartphone and test the functionality of the new screen. Check for any dead pixels, touch responsiveness, and color accuracy. Navigate through different apps and menus to ensure everything is working as it should. If you encounter any issues, double-check the connections and try reseating the screen. Once you are satisfied with the functionality, congratulate yourself on successfully replacing your smartphone screen! In conclusion, replacing your smartphone screen can seem like a daunting task, but with the right tools and guidance, it can be a manageable DIY project. By following the steps outlined in this guide, you can save yourself time and money by learning how to replace your smartphone screen on your own. Remember to take your time, be patient, and always prioritize your safety during the process. Good luck with your screen replacement journey!


